Your inventory is tracked in OrderPort, where you can adjust numbers and transfer items between locations. Total inventory consists of three figures:
- Committed: Inventory tied to unpaid orders (e.g., Pay at Pickup or items in a webstore cart).
- Sold but Not Shipped: Inventory from paid orders that haven't been released.
- On Hand: Inventory available for purchase.
Purchased inventory remains until the order is marked as released.
TABLE OF CONTENTS
- Manage Warehouse
- Adjustments
- Transfers
- Transfer Request
- Processing a Transfer Request
- Task Center
- Physical Inventory Tab
- FAQ's
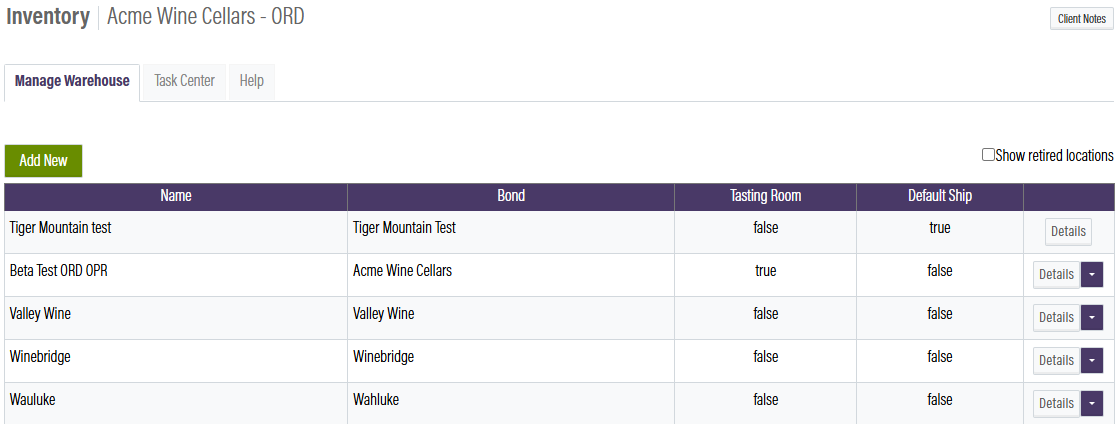
Manage Warehouse
The Manage Warehouse tab displays all tasting rooms and warehouse locations within your OrderPort system. Each location maintains its own inventory, and you can make changes by clicking 'View/Edit.' The Default location is where orders from the webstore will be fulfilled. To add a new location, click Add New.
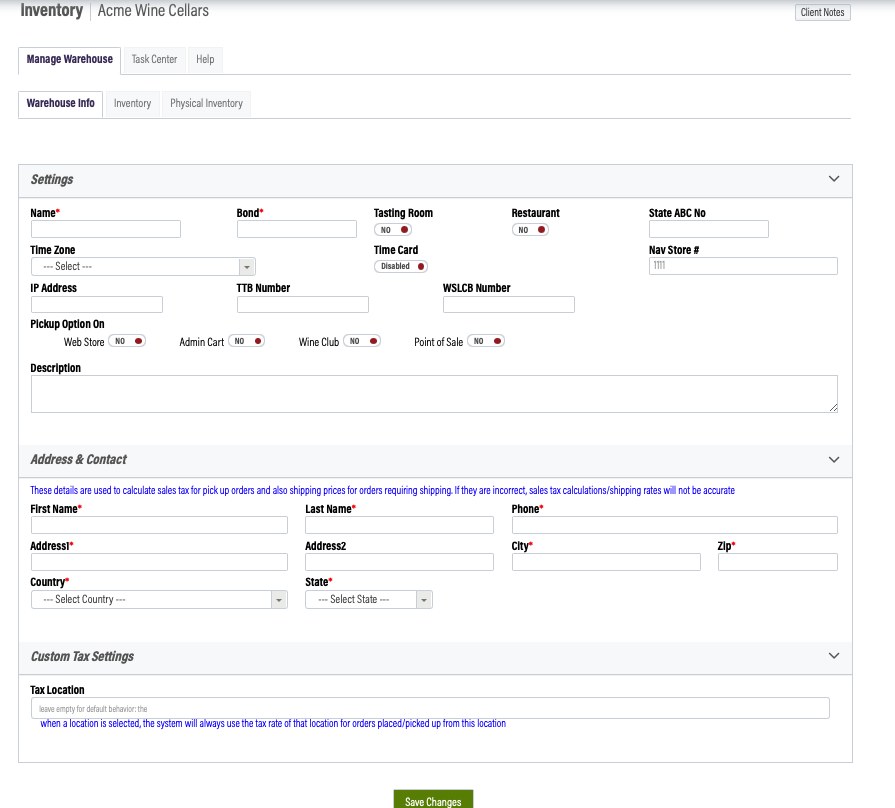
Creating a Warehouse
In order to create a warehouse, click the "Add New" button under the Manage Warehouse tab. Fill out all the information under the settings, address & contact, and custom tax settings. Make sure to save changes when you are done.
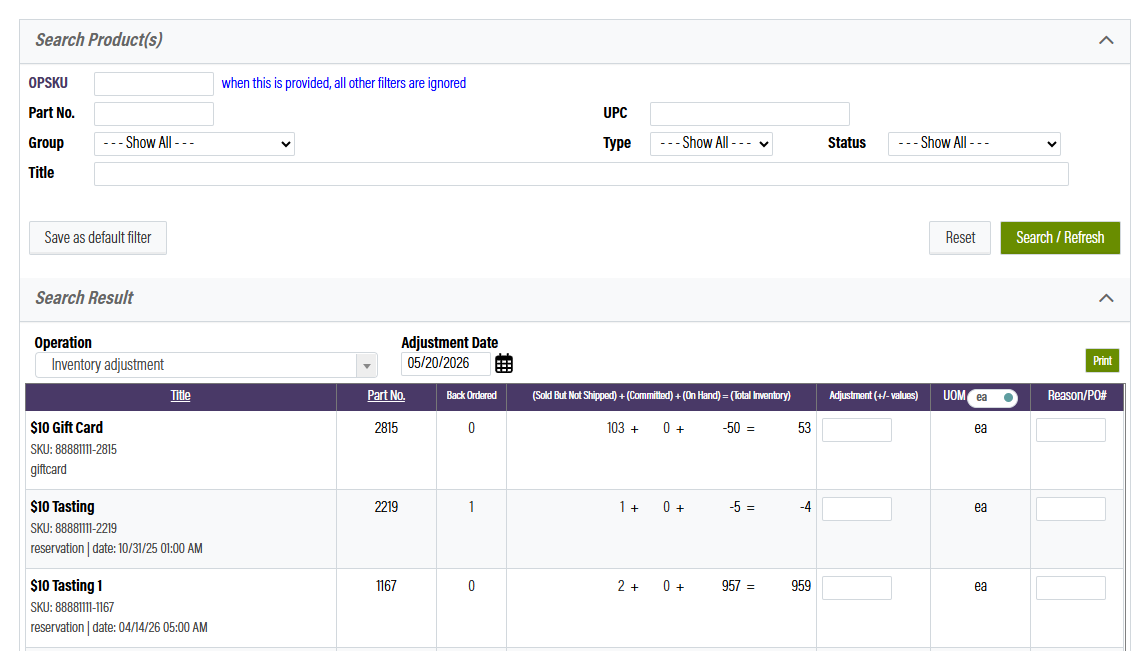
Adjustments
If you need to modify the quantities of certain wines, you can filter by group or search for specific products. In this example, we are examining our numbers for the Malbec product group.
To make an adjustment, first enter a figure in the Adjustment box. If you are adding wine, simply enter the number. If you are reducing the current number, place a minus sign (-) in front of the number. Once you have entered your adjustments, scroll to the bottom and click "Save." If the adjustment has already taken place, enter a past Adjustment Date.
Note: Adjustments add to or subtract from current numbers without replacing them.
Note: You have a 30-day limit for backdating inventory adjustments.
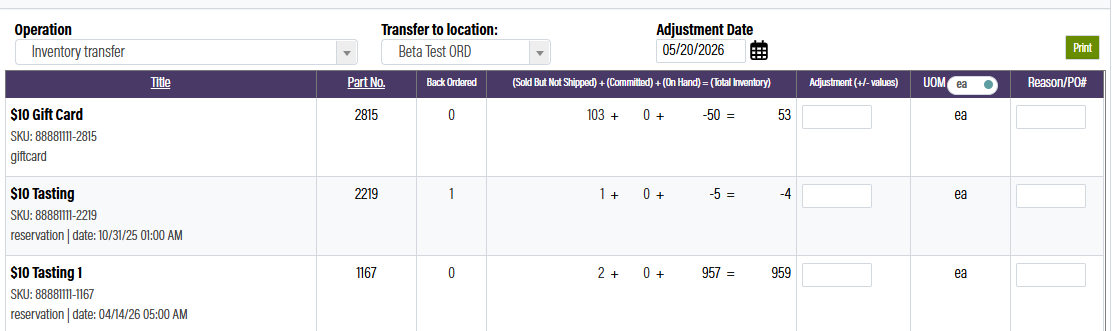
Transfers
If you have multiple locations, you can move wine between them. Start by clicking "View/Edit" for the location where the wine is currently stored. Next, select "Inventory Transfer" from the Operations dropdown menu. Then, choose the destination location for the transfer from the next dropdown menu. If the transfer has already occurred, enter the appropriate past Adjustment Date.
To proceed, find the wines that are involved in the transfer. In the Adjustment box, enter the quantity of wine being transferred. You can use the UOM toggle to specify whether the quantity is based on bottle count or case count.
Once you have completed these steps, click "Save."
Transfer Request
To ensure that transfers are officially documented, you can create an inventory transfer request. This process guarantees that inventory numbers will remain unchanged until the receiving location has marked the items as received.
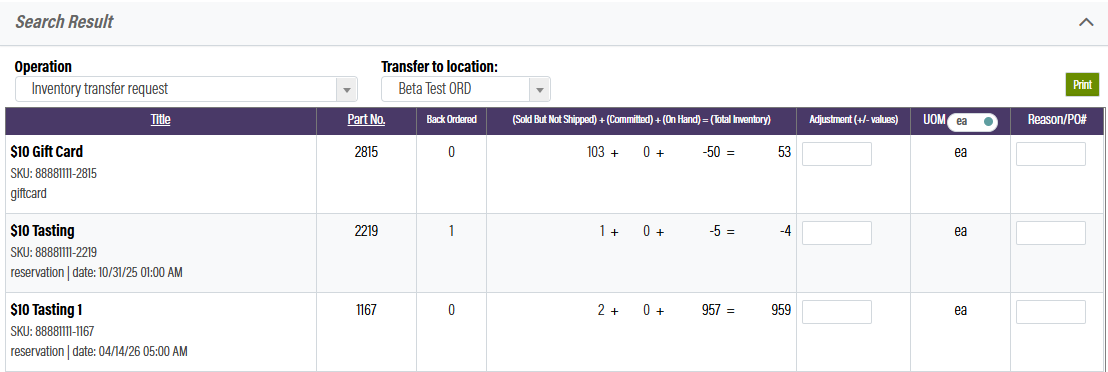
First, select "Inventory Transfer Request" from the Operation dropdown menu, then choose the destination location for the transfer. Next, locate the wines that are part of the transfer. In the Adjustment box, enter the quantity being transferred. You can use the UOM toggle to specify the count either by individual bottles or by cases. Once you have completed these steps, click "Save."
Processing a Transfer Request
The transfer request will open in a new window. If you want to add additional items, you can do so at this stage. Once all items are added to the order, click on "Generate PO."On the next page, double-check the shipping location and the included items. If you need to backdate the transfer, select a past order date.
When you are finished, click the "Complete" button. The transfer request will then appear in the Task Center, allowing management to acknowledge when the items are received.

Task Center
The Task Center enables management to create transfer requests and confirm receipt of transfers, either partially or fully. Pending tasks are shown in white, while completed tasks are marked as completed.

Physical Inventory Tab
If your winery is using the Physical Inventory tool on the point of sale, you can approve the new numbers here. Go to the Physical Inventory tab to compare the most recent count to what was listed in OrderPort.
If a tasting room count is off from the current inventory number, there will be a correction. This is the number of units that need to be added or removed from the Inventory module to make the numbers match the physical count. When you are ready to make the corrections, scroll to the bottom of the screen. Enter your PIN and click Save. The module will now reflect the latest numbers.
 FAQ's
FAQ's
How to change the time zone for a tasting room location
Go to Inventory, pick warehouse > edit/view > Warehouse info > click time zone/change the time zone and save changes.
How do we account for a wine bottle that broke?
- In Admin, adjust your inventory in the following manner:
- Go to the Inventory module
- Select the Inventory location
- Select the Inventory tab
- Enter a negative amount as an adjustment and enter the reason for the adjustment
- Save
What am I supposed to see in the Inventory Transaction Report?
The Inventory Transactions Report will show all transactions for each inventory item during any selected date range, including:
- Purchases
- Refunds
- Transfers
- Adjustments
- Donations and Samples
How does the “Sold but not Shipped” category impact inventory?
“Sold but not shipped” is deducted from available inventory. The “available” quantity will not change once sold but not shipped is released.
Can you delete a warehouse?
Unfortunately, we can no longer take requests to delete or remove warehouses from your OrderPort system. This is due to the many reporting discrepancies an action like this can cause given that the warehouse may have been used in the past for orders/transactions.