Catalog Manager Quick Guide
Catalog Manager
The Catalog Manager is where a you create and edit both products and groups. This is also where you control the visibility and availability of your products. To open the Catalog Manager, click the button under the Products tab in OrderPort admin.

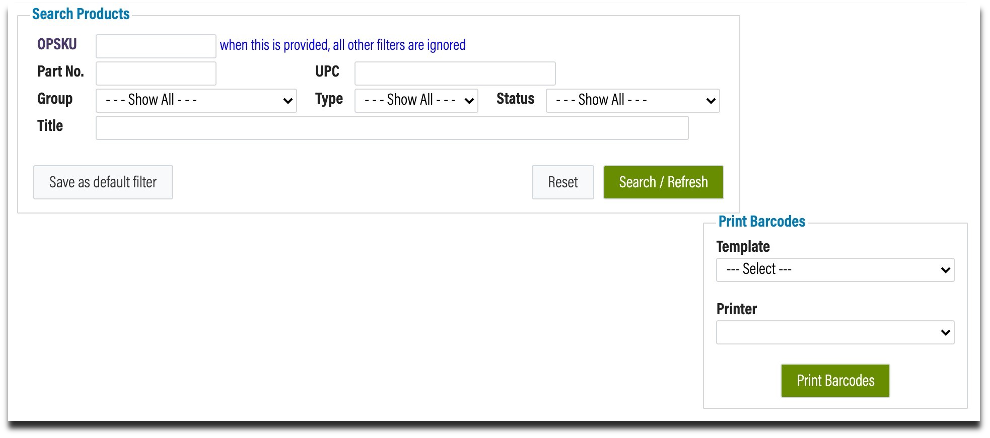
Catalog Landing Page
When you open the Catalog
Manager you will see the landing page. This is where you can search for a product or group. You can search by product name, SKU or part number. You can also filter by group or type. Once you have found the product you want to work on, click on the name to open the details.
To create a new product, click the New Product button.
To view your current groups or create a new one, click the Groups button.

Viewing and Editing a Product
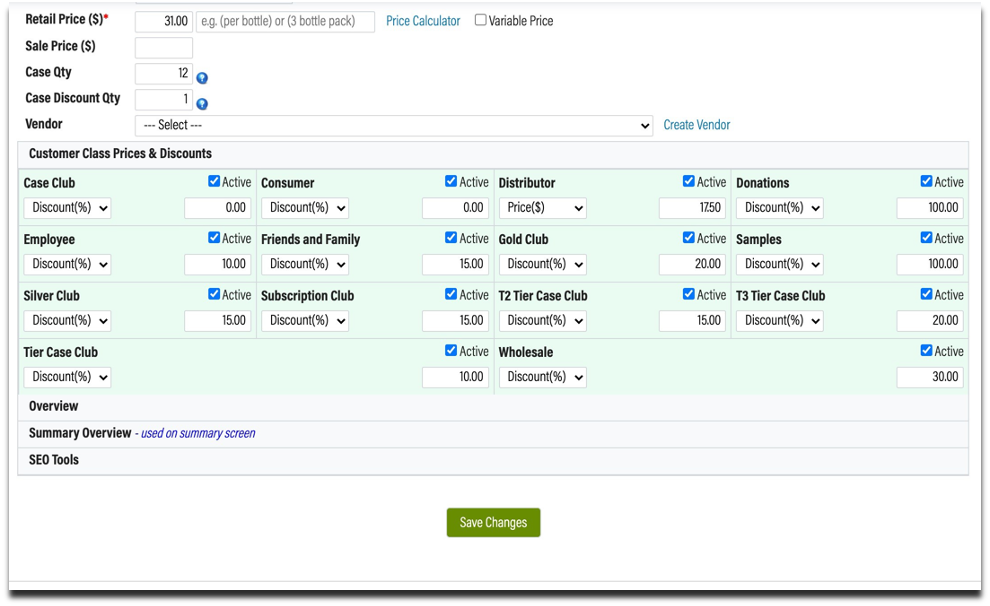
When viewing a product, the first screen you will see if the Product Info tab. This contains information such as the name, size, retail price, and customer classes discounts.
When creating a new product, you will fill out each information field so that it can be sold and tracked correctly. If you are editing a product, you can change the information in the necessary fields. Additionally, this is where you can add a photo of the product if it’s being sold on your webstore.

Below the product information are the Discount Tiles which allow you to choose which customer classes have access to the product, and if you want to set unique discounts and pricing. If a customer class tile is not activated for the product, the discount will not be triggered. It also means that customers with that class will not see the wine for sale on your webstore. These settings will only apply to this specific product.
You can also set up product descriptions. The text you enter in the Overview section will show when a customer click on the product in your webstore. The information entered in the Summary Overview will show as a brief description when a customer is browsing products in a group.
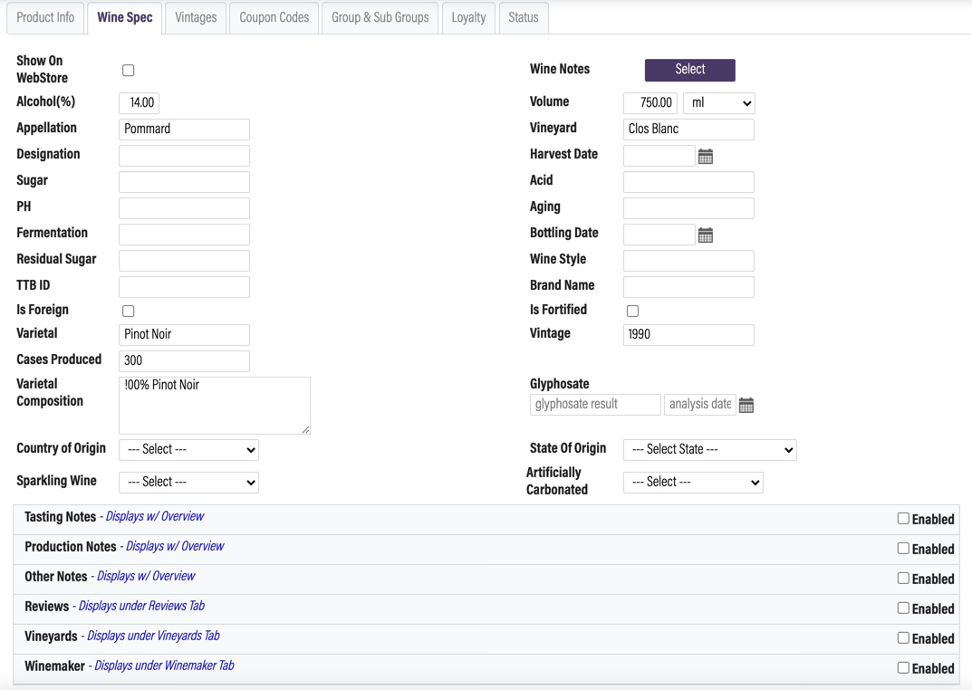
Wine Specs
This tab is where you can enter consumer and technical information on a wine product so that it’s available in OrderPort. This information will show on your webstore if you check the box at the top of the page.
Vintages
If you have multiple vintages of the same wine for sale, this tab is where you can tie them to each other. This allows a customer to see each vintage at the same time on your webstore.

Coupon Codes
This tab is where you can create a coupon code. A coupon code acts just like a promo code, but it will apply only to this specific product. Create the code, enter the number of units it applies to and then set the discount amount. You can create different codes depending on the number of units a member can purchase.
Click Save Changes when you are done.

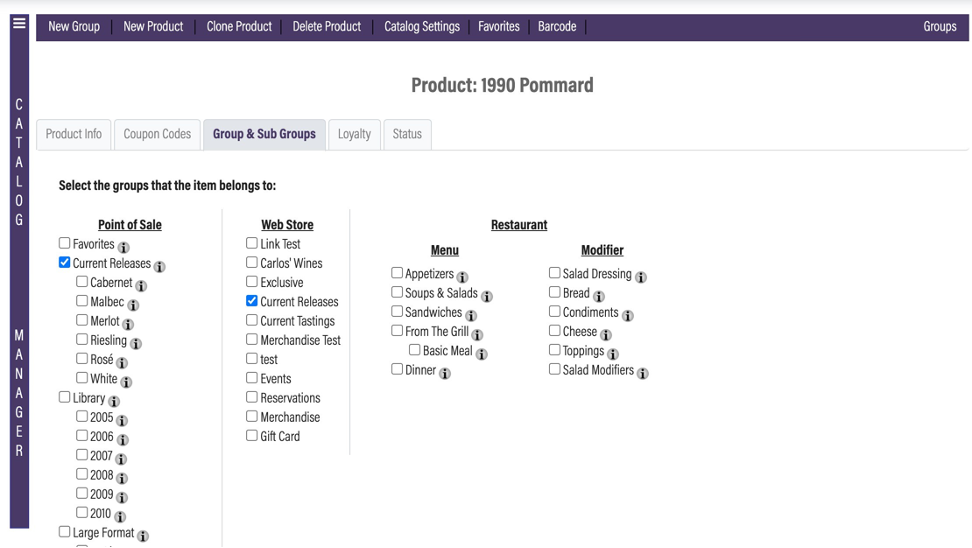
Groups and Sub Groups
This tab is where you will organize which groups and subgroups you want the product to be in. First, check the box next to the Point of Sale group you want the product to be in. This is where you will find it when checking out a customer in the tasting room. If you want the product available online, check the box next to the Web Store group you want it to appear in. When done, make sure to save your changes.
Note: if your business is using OrderPort Restaurant, you can choose a Restaurant group as well.
Loyalty
If your winery is utilizing the
Loyalty tool, you can choose which products customers can use their loyalty points on. In the example here, we are giving customers a discount on this wine if they use 100 points. Additionally, you can set a special price instead of a discount.

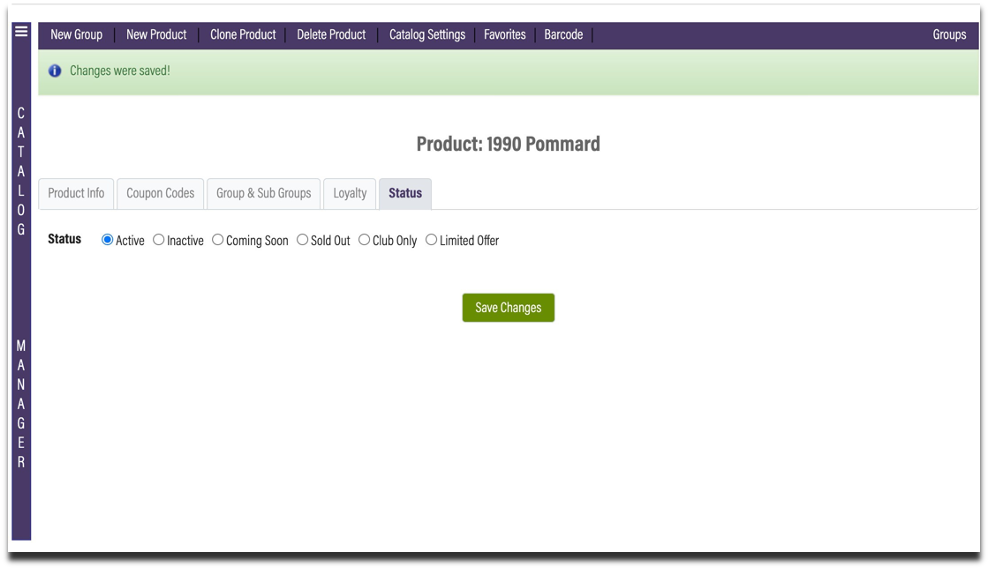
Product Status
The status of a product is the main indicator of its availability to customers. In this example the product is marked as Active, which means it’s currently available to purchase from any group it’s currently organized in. Inactive: the product is not available for sale.
Coming Soon: product will show in your webstore but cannot be purchased.
Sold Out: product visible in webstore but with a note that it’s sold out.
Club Only: product visible online but only be purchased by club members who are logged in.
Limited Offer: product is visible in webstore with a message that it’s only available for a limited time.
Groups
The groups button redirects to the Groups dashboard. This is where you can create, delete, edit and organize your groups. You can also come here to add products to their relevant groups. You can view both Point of Sale and Webstore groups here.
Note: a product must be in a group to be available for purchase.

Organizing Groups and Products
To arrange the order that groups appear on your webstore of iPad, you can click and drag them to the desired position. You can also click and drag items to be in the order you want them to show up in. This way you can ensure that each product shows up exactly where you need it. If you need to edit the products that are in your group, use the search features to add new items. To remove an item, uncheck the box next to it.

Barcodes
If you utilize bar codes in your tasting room, they can be printed from the Catalogue Manager. OrderPort supports DYMO label printers, and you can use their templates to create barcodes for each product. Note: Barcode printers and scanners cannot be purchased through OrderPort. View our supported hardware page for more information.
Catalog Settings
The Catalog Settings section contains tools that can help you better organize and present your products.
The Colors & Sizes tab allows you to create modifiers for items such as clothing and wine tools. The Image Settings tab allows you to decide how large you want product images to be on your webstore.

Product Categories are a way that you can organize products in your catalog. They differ from groups in that these are for use in reporting. The categories will not appear on the webstore or point of sale.
Webstore Settings provide options for how your webstore operates. If you do not want summary overviews showing for your products, choose the hidden option. If you want OrderPort to automatically remove items that are sold out, check the box. Additionally, you can choose here which location you would like your inventory pulled from when a customer makes an online order.
Click Save Changes if you change your settings.

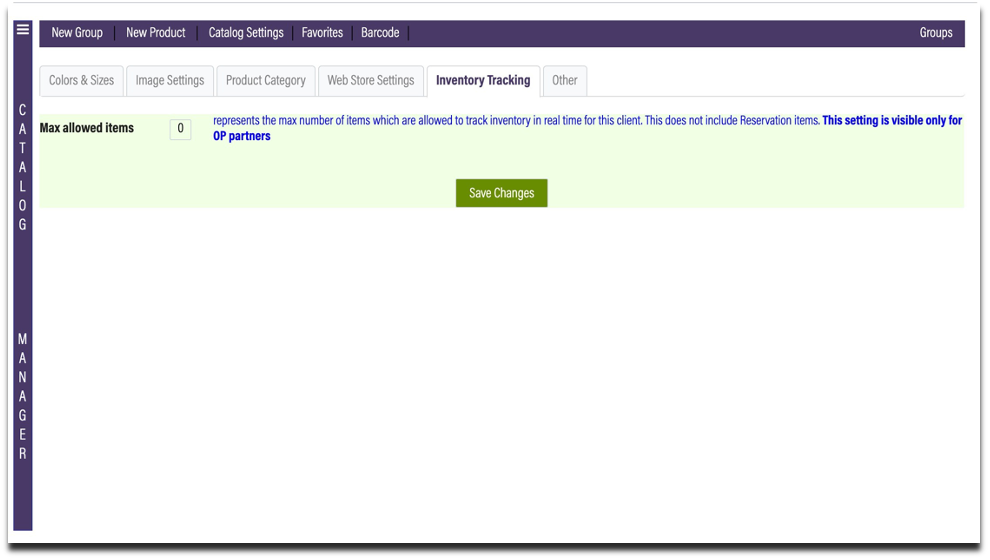
Inventory Tracking
Real Time Inventory Tracking is a tool that prevents an item from being oversold. This can be enabled for specific items that have have limited inventory. Real Time Inventory requires that a customer complete the checkout process within 15 minutes, or the item is removed from their cart. This should not be used during a wine club release to ensure customer customizations are not deleted.
Note: This tool must be enabled by OrderPort Support. We currently allow up to 15 items to be tracked.
Catalog Manager
• For further information, contact the
OrderPort Support team by phone at 206-464-1151 or by email at helpdesk@orderport.net